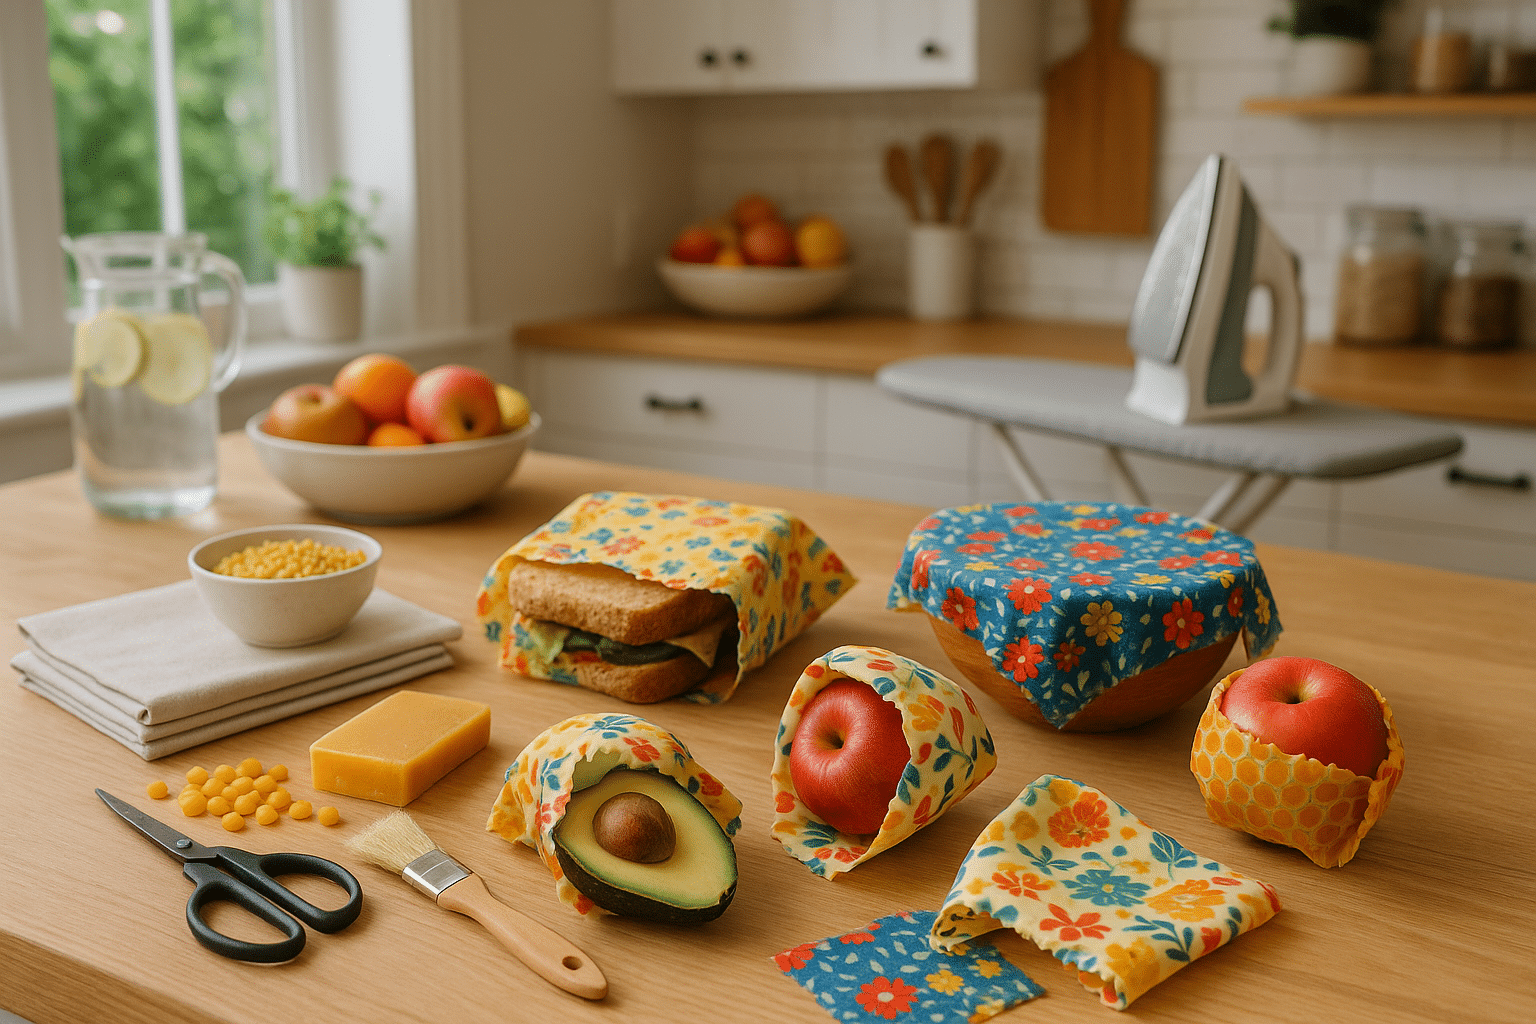
In our ongoing quest to make our lives more sustainable and environment-friendly, the concept of DIY beeswax food wraps has taken the world by storm. A practical, easy-to-make solution that harkens back to simpler times, beeswax wraps are a perfect substitute for single-use plastic wraps. These handy creations not only make food storage easy and efficient, but they also contribute significantly towards reducing plastic waste in our surroundings. 🌍💚
The beauty of beeswax wraps is their simplicity, both in terms of creation and usage. All you need is a piece of fabric, some beeswax, and a little time and effort. Plus, they’re reusable! After a simple washing process, they’re ready to go again, making them an economical and eco-friendly choice for any household.
In this extensive guide, we will delve into the nitty-gritty of creating your own beeswax food wraps, breaking down the process into manageable steps that even beginners can follow. We’ll explain each step in detail, offering tips and tricks to help you get the best results.
Why Beeswax Wraps?
Before we dive into the ‘how’, let’s take a moment to understand the ‘why’. Why are beeswax wraps an eco-friendly solution for sustainable food storage? How are they contributing to the global fight against plastic pollution? 🌱
The sad reality is that plastic pollution is a pressing global issue. Each year, millions of tons of plastic end up in our oceans, wreaking havoc on marine life and ecosystems. Single-use plastic, such as food wraps, plays a significant role in this crisis.
Beeswax wraps are a small, yet powerful solution to this problem. They are biodegradable and reusable, making them a sustainable alternative to single-use plastic wraps. Plus, they can be made at home, adding to their eco-friendliness.
Easy and Fun to Make
Another compelling reason to embrace beeswax wraps is their ease of creation. It’s a fun DIY project that you can do alone or with your family, and it doesn’t require any complex tools or materials. 🐝
Our guide will take you through each step of the process, from choosing the right fabric to applying the beeswax and letting your wraps dry. We’ll also provide insights on how to care for your wraps to ensure they last as long as possible.
Customizable and Personal
One of the exciting aspects of making your own beeswax wraps is the ability to customize them to suit your preferences. You can choose the fabric patterns and colors that appeal to you, making your food storage not only practical but aesthetically pleasing as well. It’s an opportunity to infuse a little bit of your personality into your kitchen essentials. 🎨
In summary, if you’re looking for a fun, easy-to-make solution for sustainable food storage, beeswax wraps could be just the ticket. Not only will they help reduce your carbon footprint, but they’ll also add a touch of personal flair to your kitchen. So, without further ado, let’s get into the art of making beeswax wraps!
Discover the Benefits of DIY Beeswax Food Wraps
If you’re passionate about both sustainability and DIY projects, then creating your own beeswax food wraps is a fantastic opportunity to blend these two interests. Not only are beeswax wraps a more environmentally-friendly alternative to traditional plastic wrap, but they are also incredibly simple to create at home, requiring just a few materials and a little bit of time. This article will guide you through the entire process, ensuring that you end up with high-quality, reusable food wraps that are perfect for sustainable food storage.
For those unfamiliar, beeswax wraps are a type of food storage material that can be used to wrap around food items or cover bowls and containers. They are made by infusing a fabric, usually cotton, with a mixture of beeswax, jojoba oil, and tree resin. The result is a wrap that is flexible, sticky enough to hold its shape, and also has natural antibacterial properties.
Before we dive into the DIY process, let’s take a look at why beeswax wraps are such a beneficial addition to your kitchen. They are reusable, often lasting for up to a year with proper care, which can save you money in the long run. Moreover, when they do eventually wear out, they can be composted, reducing waste. This is a stark contrast to plastic wrap, which is not biodegradable and can take hundreds of years to break down in the environment.
What You Need to Make DIY Beeswax Food Wraps
Embarking on the journey of making your own beeswax food wraps is exciting. To start, you will need the following materials:
- 100% cotton fabric
- Beeswax pellets
- Jojoba oil
- Pine resin
- An old paintbrush
- Parchment paper
- An old baking sheet
You can easily find these items online or at your local craft store. When choosing your fabric, feel free to pick patterns and colors that match your kitchen or personality. The goal is to make the sustainable choice fun and appealing!
As for the measurements, it depends on how many and what size wraps you want to create. A good rule of thumb is to have equal parts beeswax, jojoba oil, and pine resin. For a medium-sized wrap, you will need about 2 tablespoons of each ingredient.
Step-by-Step Guide to Making Beeswax Wraps
Now that you have your materials ready, let’s dive into the DIY process. Here’s a step-by-step guide to making your very own beeswax food wraps:
1. Preheat your oven
Start by preheating your oven to a low temperature, around 200 degrees Fahrenheit (or 90 degrees Celsius). It’s essential to keep the heat low to prevent the wax from burning.
2. Prepare your fabric
Cut your fabric into the desired size and shape. You might want to make a few different sizes for different uses. For instance, small squares are perfect for wrapping up half a lemon or avocado, while larger ones can cover bowls or wrap a sandwich.
3. Spread the beeswax mixture
Next, evenly spread the beeswax, jojoba oil, and pine resin on one side of the fabric. A helpful tip is to grate the beeswax and resin before applying it to the fabric. This will make the melting process smoother and faster.
4. Heat the fabric
Place the fabric on a baking sheet lined with parchment paper, then put it in the oven. Watch it closely and remove it when the beeswax has melted completely, which should take about 5-10 minutes.
5. Spread the melted beeswax
Quickly use your paintbrush to spread the melted wax evenly across the fabric. Be careful not to burn yourself! The wax will start to harden quickly, so you need to work fast.
6. Let it dry
Finally, hang your beeswax wrap up to dry, which should only take a few minutes. Once it’s completely dry, it’s ready to use!
For a visual guide to this process, you can check out the video “DIY Beeswax Food Wrap Tutorial” by Nifty on YouTube. This will provide you with a visual understanding of the process and tips for success.
Comparing Beeswax Wraps to Other Food Storage Options
Now that you’ve learned how to make your own beeswax food wraps, you might be wondering how they stack up against other food storage options. Here’s a comparison of some common methods:
| Storage Method | Pros | Cons |
|---|---|---|
| Beeswax Wraps | Reusable, compostable, natural antibacterial properties | Requires care to maintain, not microwave safe |
| Plastic Wrap | Cheap, easy to use | Not reusable, not biodegradable |
| Reusable Silicone Lids | Reusable, dishwasher safe | Higher initial cost |
| Glass Containers with Lids | Reusable, microwave safe | Bulky, breakable |
As you can see, each method has its pros and cons. The decision ultimately depends on your lifestyle and preferences. However, beeswax wraps are a fantastic eco-friendly and DIY option for those looking to reduce their plastic usage and waste. They also make great gifts for environmentally conscious friends and family members!
So, why not give it a try? With just a few simple steps, you can create your own DIY beeswax food wraps at home. You’ll be doing your part to contribute to a more sustainable future, all while creating something practical and beautiful for your kitchen. Happy crafting! 🐝

Conclusion
In conclusion, we have journeyed together through the intricate world of software engineering and IT, and have unraveled some of the key concepts that make these fields so fascinating and essential in our technologically driven era. Throughout this article, we have touched upon numerous topics, all which are vital to an in-depth understanding of the realm of IT and software engineering.
We began our discussion with the definition and significance of software engineering, highlighting its crucial role in the design, development, and maintenance of software systems. We then delved into the different methods and tools utilized in software engineering such as Waterfall, Agile and DevOps, and the implications these have on the software development lifecycle. 🛠️
Subsequently, we took a detailed look at the various roles and responsibilities within a software engineering team, shedding light on the various functions they play, from systems architects to quality assurance specialists. This offered an inside look into the workings of a software engineering team, and the collaborative effort required to achieve successful software solutions. 👥
Next, we scrutinized the world of IT and its relationship with software engineering. We explored how IT supports software engineering through infrastructure, while also enhancing the efficiency and effectiveness of software solutions. We also underscored the importance of cybersecurity and data protection, especially in this era of heightened cyber threats. 🛡️
In addition, we ventured into the trending topics of AI and machine learning, discussing how these cutting-edge technologies are revolutionizing the IT and software engineering landscape. We also examined the implications these technologies have on jobs, ethics, and the future of technology. 🤖
The importance of continuous learning and development in these rapidly evolving fields was also emphasized. From obtaining relevant certifications to staying abreast with the latest industry trends, we highlighted the need for professionals in these fields to keep improving and adapting. 📚
We hope that this comprehensive guide has not only expanded your knowledge on software engineering and IT but also sparked your interest and curiosity in these fields. It is our belief that with the understanding you have gained, you will be better equipped to navigate and contribute to the IT and software engineering sphere.
We invite you to leave your comments, share this guide with others, and apply what you’ve learned in your own professional journey. Your engagement and feedback are invaluable in fostering a vibrant and interactive learning community. 💬
Remember, this is just the beginning. The world of software engineering and IT is vast and ever-evolving. Stay curious, keep exploring, and let the knowledge you’ve gained be the foundation for your future endeavors. 🔭
To further your understanding, you can visit some of these resources:
– Association for Computing Machinery (ACM)
– IEEE Computer Society
– Software Engineer Insider
These platforms offer a wealth of information on the latest research, trends, and discussions in the field of IT and software engineering.
Remember, “The science of today is the technology of tomorrow.” (Edward Teller) Let’s keep building the future, one line of code at a time. 💻
References:
– IEEE Xplore
– ACM Digital Library
– Springer: Computer Science
Note: These links were last accessed on [insert date]. Please, ensure they are still active when accessing them.


